![How to Embed Testimonials on Website in 2026 [2 Methods + Tips]](https://embedsocial.com/wp-content/uploads/2024/09/embed-trustpilot-reviews-step-01-use-ai-to-describe-your-widget-1024x576.webp)
Did you read somewhere that you need to embed testimonials on your website? It’s true! But you have to do it just right, so they dynamically update and keep your site fresh.
Adding testimonials is easy once. However, you have to think about maintaining their relevancy, and they should also match your brand style and colors.
So, instead of manually adding static testimonials one by one, you have to learn how to embed testimonials using a third-party review management platform.
For instance, EmbedSocial will connect to all relevant review sites, including Google and all popular social media platforms, to retrieve feedback your customers might have left you. Then, it will help you manage and display testimonials on your website via a testimonial widget.
Keep on reading below, as I cover both methods. Plus, I tell you where to place your testimonials, which formats work best, and why you need dynamic testimonial widgets.
What “embed testimonials” really means?
When people search to embed testimonials, they may be describing a few things:
Sometimes they mean adding a few customer quotes to a homepage. Sometimes they mean using a testimonial plugin for website pages. And very often, they also want to embed Google reviews on website pages in a format that feels more curated and conversion-friendly.
In practice, embedding testimonials usually means one of these:
- Adding quote blocks manually inside a page builder or CMS;
- Displaying positive reviews in a testimonial-style layout;
- Embedding a testimonial widget that updates automatically;
- Combining reviews, quotes, and other trust signals into one social proof section.
That distinction matters because the method you choose changes how much work your testimonial section will require later.
A manually added quote may look fine today. But if you want to add testimonials next month, reuse them on three pages, or keep the section visually consistent across your site, manual updates start to feel slow very quickly.
The 2 best ways to add testimonials to a website
There are two methods of adding testimonials to your website: manually finding and adding them via a customizable block in your website builder (or via HTML code if you have the skills for it), or there’s a better way: using dynamic third-party website widgets.
If you only need to show a few quotes on a simple page, manual embedding can be enough.
But, if you’re looking to scale and/or always deliver fresh customer feedback across your home, product, and landing pages, you’re better off finding great review management software that will automatically keep on collecting the freshest testimonials for you.
Method 1: Use advanced testimonial widgets via EmbedSocial
This is the modern method:
- Build your testimonial widget with AI
- Connect your testimonial sources
- Choose a template that fits your site
- Refine the widget with AI
- Copy the embed code
- Paste the code into your website
Instead of pasting testimonials into each page manually, you create a testimonial widget, style it using AI, embed it where needed, and let it work on your behalf.
That is what makes this method better suited for growing websites. But before using it, you should create your EmbedSocial trial account (there’s a free review widget, too):
Step 1: Build your testimonial widget with AI
Start by describing the kind of testimonial widget you want in the AI prompt. Based on your input, the AI builder can recommend layouts, styling, and interaction patterns that fit your brand and the type of social proof you want to show:
Step 2: Connect your testimonial sources
Next, click Connect your source to bring in the testimonials or reviews you want to display. Depending on your setup, this can include direct testimonial submissions, customer reviews, or other approved feedback sources:
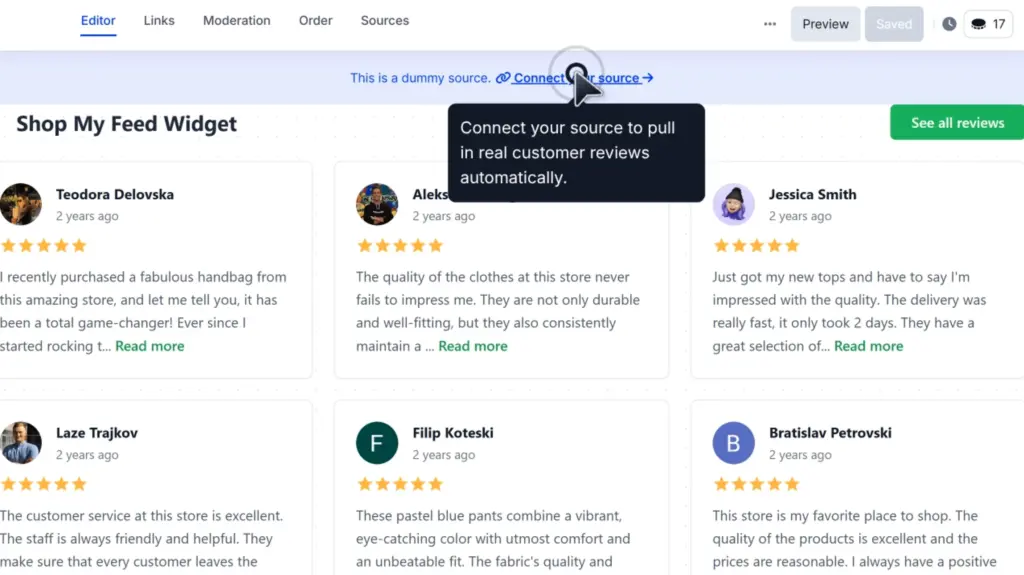
Note: You can also add content manually if you want more control over which testimonials appear in the widget.
Step 3: Choose a template that fits your site
Browse the available templates and select one that matches your website design. You can choose from formats like sliders, grids, carousels, or Wall of Love layouts, depending on how you want the testimonials to appear:
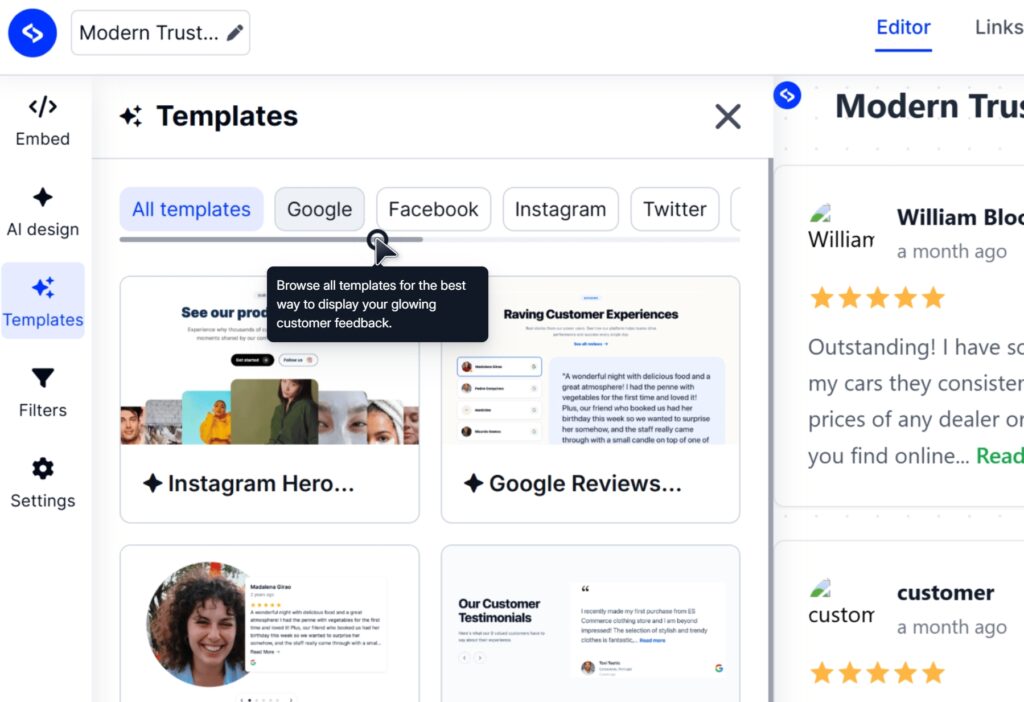
Once you click Use template, your widget will populate with your testimonial content so you can immediately see how it looks on the page.
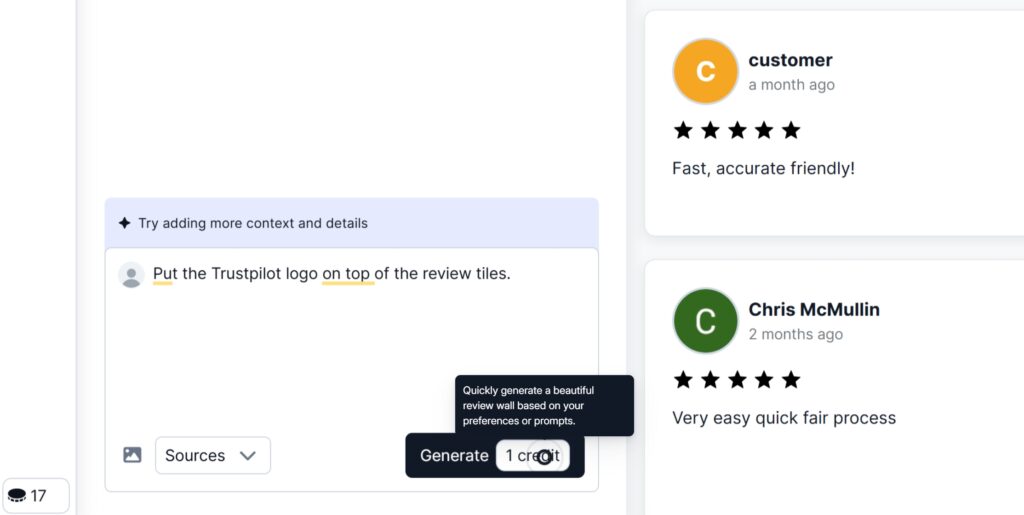
Step 4: Refine the widget with AI
After selecting a template, you can continue improving the design with additional AI prompts. This makes it easy to adjust the look, structure, and presentation of the widget until it fits your site more closely:
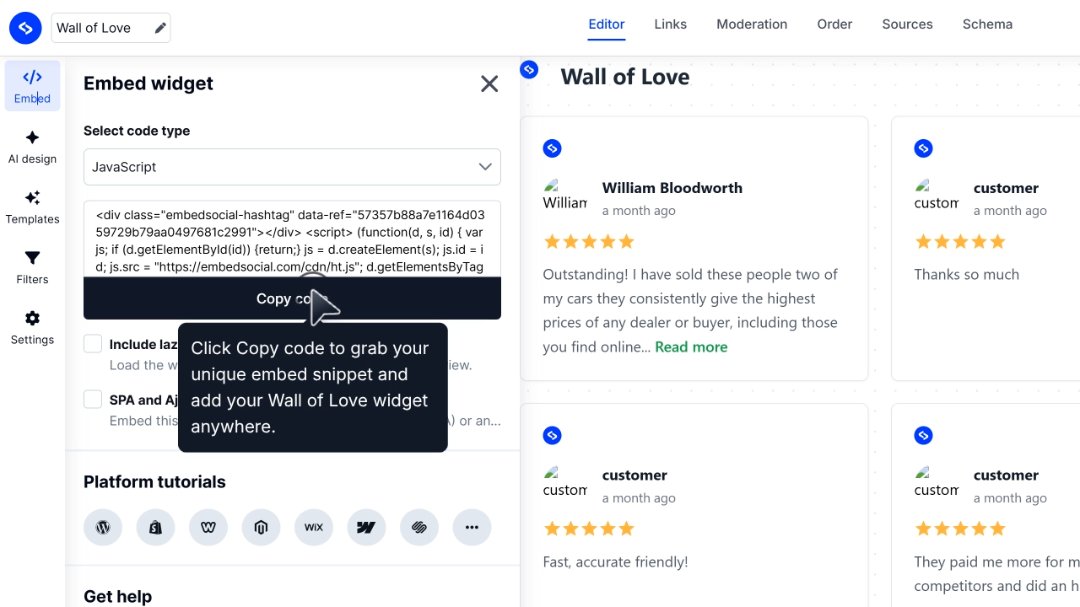
Step 5: Copy the embed code
When your widget is ready, go to the Embed tab and copy the code. This code is what you will use to place the testimonial widget anywhere on your website:
Step 6: Paste the code into your website
Finally, open the page where you want the testimonials to appear and paste in the widget code. On WordPress, for example, you can do this with a simple Custom HTML block.
That’s it. You now have a live testimonial section on your website that looks more polished, is easier to manage, and helps strengthen trust with potential customers.
Here’s one of our ready-to-go testimonial widget templates:
(function(d, s, id) { var js; if (d.getElementById(id)) {return;} js = d.createElement(s); js.id = id; js.src = “/cdn/ht.js”; d.getElementsByTagName(“head”)[0].appendChild(js); }(document, “script”, “EmbedSocialHashtagScript”));
How to embed testimonials across different website builders?
The process is similar across all popular CMS and website platforms:
Method 2: Add testimonials manually
This is the basic fallback method that’s sufficient now and then.
Namely, you can add testimonials by hand using text blocks, quote blocks, page builder sections, or custom HTML. It works, and for some small sites, that is enough.
However, unlike EmbedSocial’s plug-and-play widgets that only require you to copy a single code, this method requires a tad more manual actions and knowledge:
- Find and copy the testimonials you want to embed.
- You can either copy the text or take a screenshot.
- Add the right website element via your website builder.
- Text, quote, image, or custom HTML block.
- Paste the text or attach your image.
- You may have to add the right image attributes.
- Save your changes and refresh the page.
Once you’re done, your new page element will appear where you added it, but it’s not a flexible solution, since you will have to update it manually with new feedback.
For instance, here’s a screenshot of two Google reviews. As you can see, you cannot change the layout, colors, aspect ratio, or any other design element:
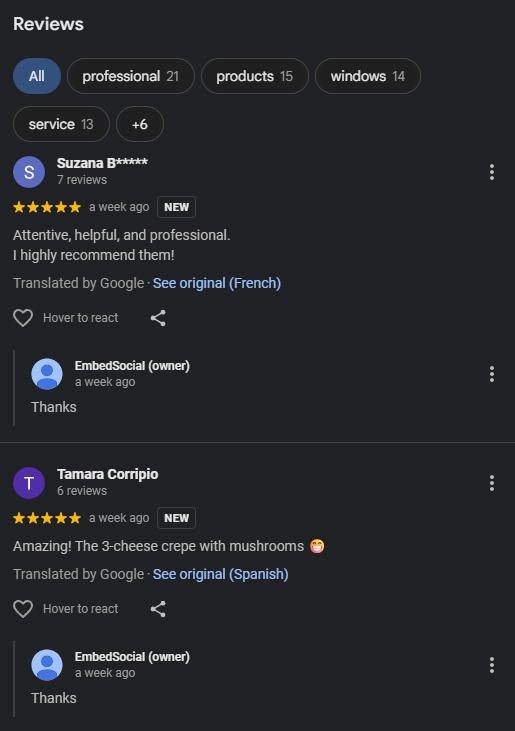
Note: this method stays easy only while the testimonial count stays small.
When does manual embedding still make sense?
Considering the above, you can embed reviews on website manually in a few cases:
- Inexpensive solution for one-off pages;
- Works with built-in website tools;
- Does not require a third-party system;
- Fine for a very small site with a handful of quotes.
That said, the limitations show up quickly.
Where manual testimonials start breaking down
Best practices to keep in mind here:
- Update testimonials regularly, because static sections go stale fast.
- Keep formatting across pages, because manual edits create a visual mismatch.
- Use only your strongest quotes, because hand-built sections get cluttered easily.
- Avoid scattering different testimonial styles across the site, because trust signals feel weaker when presentation is inconsistent.
- Do not rely on manual sections if you expect steady new online reviews or feedback, because maintenance becomes a bottleneck
Manual embedding is not wrong. It is just harder to maintain once the website grows beyond a few brochure-style pages, and you need new prospective clients.
In general, manual layouts work best when you only need a few static quote cards. If you want more variety, easier updates, and more polished display options, dynamic widgets through a tool like EmbedSocial give you a lot more flexibility.
Comparison table: dynamic widgets vs manual embedding
Let’s summarize all I’ve shared about these two methods above:
Method 1: Advanced widget via EmbedSocial
Method 2: Manual static testimonials
Initial setup
Fast
Fast for a few quotes
Updating later
Easy
Manual every time
Design consistency
High
Varies page by page
Scalability
Strong
Weak
Multi-page use
Easy
Tedious
Freshness
Easy to maintain
Often becomes stale
Moderation
Built for it
Manual and fragmented
Best for
Growing sites and active marketing pages
Small sites with a few fixed quotes
Remember: Dynamic testimonial widgets matter when your site has multiple decision points. If you want to add social proof to your homepage, pricing page, service pages, and landing pages without managing each section separately, this method saves a lot of time.
Where to display testimonials on your website?
Placement matters almost as much as the testimonial itself. A great quote in the wrong place can do very little. A relevant quote near the right decision point can do a lot.
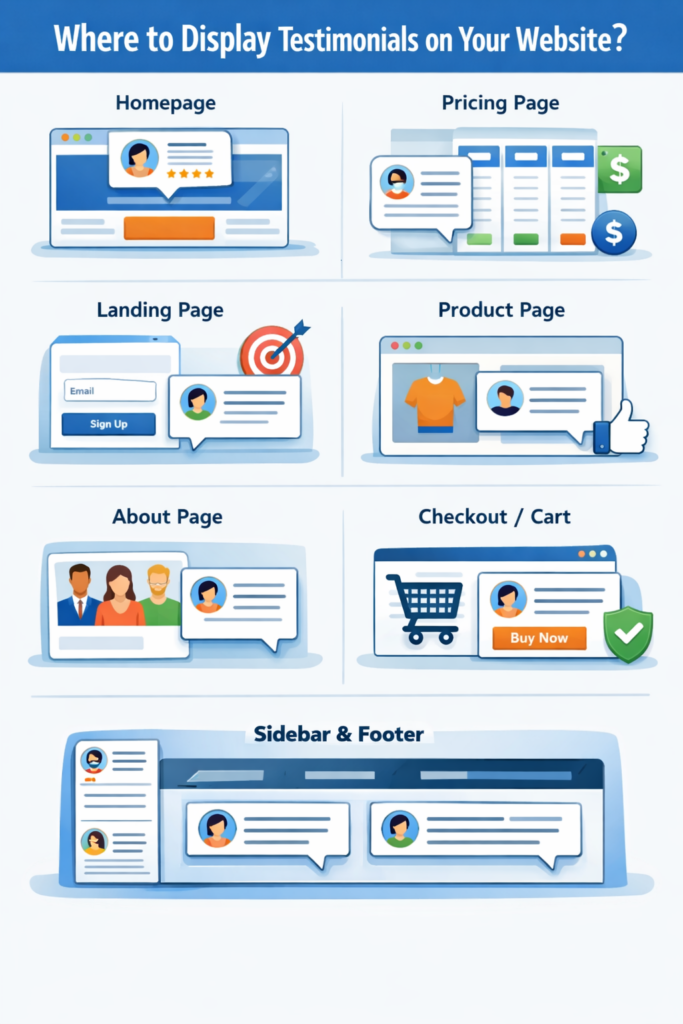
Homepage
The homepage is often where first impressions form, so this is one of the strongest places to embed testimonials. Benefits include:
- Builds trust quickly for first-time visitors
- Supports your value proposition early
- Helps brand claims feel more credible
Pro tip: Put your strongest proof above the fold or directly below the hero section so visitors see trust signals before they begin doubting your claims.
Pricing page
This is where visitors start weighing cost against confidence. Benefits include:
- Reduces friction before a purchase or inquiry
- Helps justify price with real outcomes
- Reassures visitors who are comparing options
Pro tip: Use quotes about value, ROI, ease of use, or results. Pricing pages need reassurance more than generic praise.
Landing pages
Landing pages work best when every element supports one focused action. Benefits include:
- Reinforces the specific promise of the page
- Adds trust near form fills or CTA clicks
- Strengthens campaign relevance
Pro tip: Match the testimonial to the exact offer on the page. A highly relevant quote will outperform a generic glowing review.
Product or service pages
These pages need proof tied to the exact thing being considered. Benefits include:
- Validates the product or service in context
- Helps buyers imagine a successful outcome
- Supports decision-making with specific use cases
Pro tip: Use testimonials that mention the specific product, service, pain point, or result tied to that page.
About page
The About page is less about features and more about trust. Benefits include:
- Builds confidence in the people behind the business
- Reinforces professionalism and reliability
- Helps your company feel more human
Pro tip: Prioritize testimonials about responsiveness, reliability, expertise, or working relationship, not just feature praise.
Checkout or cart
At this stage, the goal is not storytelling. It is a reassurance. Benefits include:
- Reduces last-minute hesitation
- Supports trust before purchase completion
- Can help calm abandonment risk
Pro tip: Keep testimonials short here. A quick reassurance quote is stronger than a large widget that distracts from checkout.
Blog posts
Testimonials can work inside blog content, but only when they belong there. Benefits include:
- Support authority inside educational content
- Reinforce a claim naturally when relevant
- Connect advice with customer outcomes
Pro tip: Only add testimonials when they strengthen the article naturally. Forced social proof inside a blog post can feel overly promotional.
Sidebar
A sidebar can carry light trust signals across multiple pages. Benefits include:
- Keeps proof visible without dominating the page
- Works across templates where sidebars are consistent
- Supports pages that need subtle reinforcement
Pro tip: Use a compact quote card or small rotating testimonial instead of a large, heavy widget.
Footer
The footer is not your primary proof zone, but it can still help. Benefits include:
- Adds a final layer of reassurance
- Supports trust on every page
- Works as a subtle reinforcement
Pro tip: Use footer testimonials as supporting proof, not as your main testimonial section.
Dedicated testimonials page
This is where you can go broader and show a fuller proof library. Benefits include:
- Gives visitors a proof hub to browse
- Supports internal linking and sales conversations
- Lets you showcase more variety without cluttering core pages
Pro tip: Mix formats here, such as written quotes, review-style cards, video clips, logos, or filtered widgets, so the page feels curated instead of repetitive.
Best testimonial formats to embed
Not every testimonial format belongs on every page. The right layout depends on how much proof you want to show, how fast visitors need to understand it, and how much space you have:
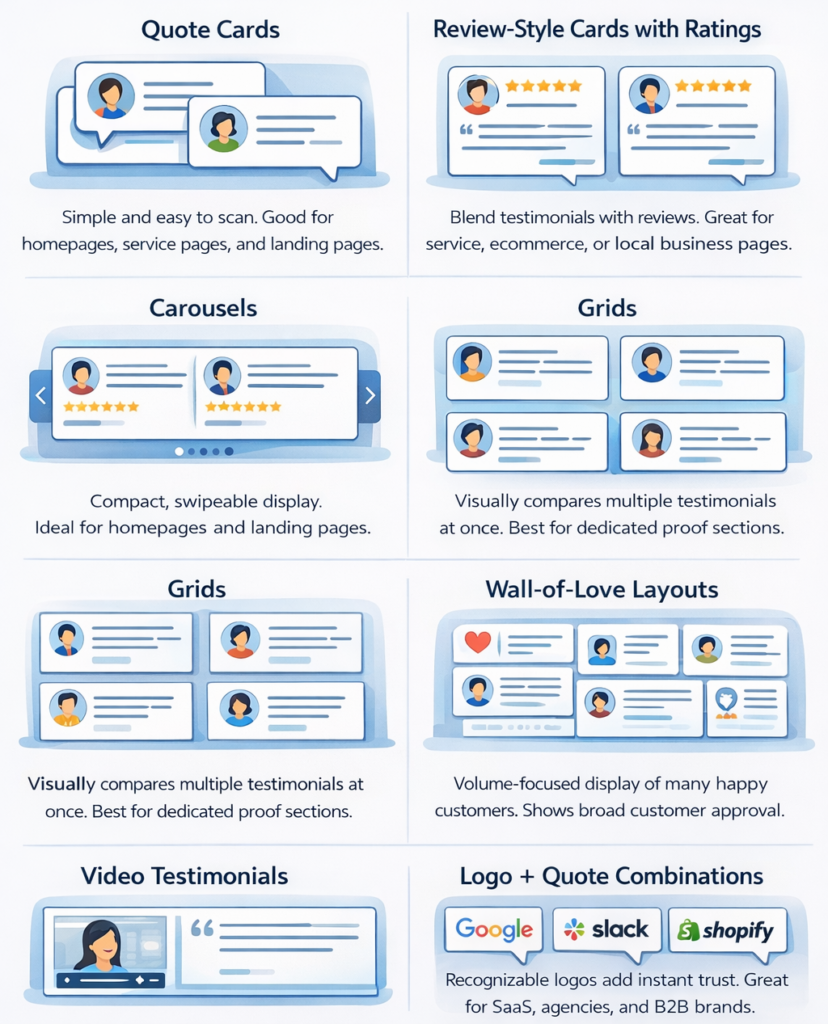
Quote cards
Quote cards are the simplest format to display testimonials. They are easy to scan, easy to style, and work well on homepages, service pages, and landing pages where you want a few curated quotes to support the main message.
Review-style cards with ratings
These are useful when you want testimonials to feel closer to recognizable customer feedback. They add credibility and work especially well when you want to blend testimonials with reviews on service, ecommerce, or local business pages.
Carousels
Carousels are a strong choice when space is limited, but you still want to show more than one testimonial. They keep the layout compact, which makes them useful for homepages, landing pages, and other sections where screen space is tight.
Grids
Grids work best when you want to show several testimonials at once without hiding them behind clicks or swipes. They are easier to compare visually and are often the better option for dedicated proof sections.
Wall-of-love layouts
A wall-of-love layout creates the impression of broad, active customer approval. It works well when you have a larger volume of positive feedback and want your testimonial section to feel fuller and more dynamic.
Video testimonials
Video testimonials take more effort to collect, but they can be much more persuasive than text alone. They are especially effective when buyers need stronger reassurance, such as in B2B, service-based, or higher-ticket purchase journeys.
Logo + quote combinations
This format is especially effective when customer recognition adds trust on its own. Pairing a strong quote with a recognizable company logo can make the testimonial feel more credible at a glance, especially for SaaS, agencies, and B2B brands.
Why choose EmbedSocial for your growing business?
You could check out several different review management platforms, but we’ve developed EmbedSocial to include everything you need and more into one complete package.
Here are some of the benefits you get:
- Faster setup across multiple pages
- Easier updates when new testimonials come in
- More consistent design across the site
- Stronger control over moderation and approval
- Easier reuse of reviews as website-ready testimonials
- Better scalability for homepages, pricing pages, landing pages, and service pages
- Less dependency on manual editing every time the proof changes
With EmbedSocial, you’re building a testimonial system that can help you collect, curate, approve, style, and publish social proof everywhere it can make an impact.
You can use different layouts depending on the page and the goal. A homepage might need a website carousel. A dedicated testimonial page might work better as a wall-of-love layout. A landing page may only need a few highly relevant quotes near the main CTA.
Best of all: You don’t need to rebuild the section every time your best proof changes!
Why businesses embed testimonials?
Before deciding where to place testimonials, it helps to understand why businesses add them in the first place. Here are just a few of the benefits:
- Make your product/service claims feel more believable.
- Reduce hesitation and move the consumer decision-making process.
- Add social proof without forcing visitors to leave the page.
- Help product, pricing, and landing pages feel more trustworthy.
- Give prospects evidence from satisfied customers.
A hidden reviews page rarely works as hard as testimonials placed directly where decisions happen. That is why embedded testimonials usually outperform proof that sits off to the side or lives on a separate platform, such as Google, Trustpilot, and others.
Collect testimonials strategically, then link out
To get reliable and impactful testimonials, you need the right timing, the right prompt, and the right level of specificity. A quote like “Great service, highly recommend” is usable. A quote that explains the problem, result, or experience is much stronger.
So, think about these best practices to get more testimonials:
- Ask at the right moment, usually after a clear customer win
- Get permission before publishing
- Look for specifics instead of generic praise
4 sets of best practices for embedding testimonials
The difference between a testimonial section that converts and one that gets ignored usually comes down to execution. This is how you execute to perform:
1. Make testimonials believable
Benefits of doing this well:
- Builds trust faster
- Makes the proof feel authentic
- Reduces skepticism
Best practices:
- Use real names whenever possible.
- Add job title, company, photo, or context when available.
- Prioritize specific outcomes over vague compliments.
- Avoid language that feels overly polished or suspiciously perfect.
- Get clear permission before publishing customer content.
2. Make testimonials relevant
Benefits of doing this well:
- Makes proof feel more persuasive
- Supports buyer intent on the page
- Improves clarity at decision points
Best practices:
- Match testimonials to the page where they appear.
- Use value-focused proof on pricing pages.
- Use feature or outcome-focused proof on product and service pages.
- Avoid overcrowding pages with too many similar quotes.
- Choose relevance over quantity.
3. Make testimonials easy to read and trust
Benefits of doing this well:
- Improves scanning
- Keeps attention near the CTA
- Makes proof feel integrated instead of decorative
Best practices:
- Keep the design aligned with the rest of the website.
- Use readable spacing and typography.
- Make widgets mobile-friendly and fast-loading.
- Avoid layouts that distract from the main action.
- Make the testimonial section feel like part of the page, not something bolted on later.
4. Keep testimonial content fresh
Benefits of doing this well:
- Prevents the section from feeling stale
- Helps your best proof stay visible
- Keeps trust signals relevant over time
Best practices:
- Refresh older proof periodically.
- Replace weak generic testimonials with stronger ones.
- Update testimonial sections as your offers evolve.
- Switch to dynamic widgets when manual upkeep becomes a bottleneck.
Conclusion: Use the method you can keep improving
If you only need to embed a few testimonials once, manual sections can work.
But most businesses need new offers, build new landing pages, refresh homepages, update pricing pages, and collect better customer proof over time. That is where manual testimonial sections start becoming a maintenance problem instead of a trust asset.
Dynamic testimonial widgets like EmbedSocial’s solve that issue. They make it easier to keep your proof current, visually consistent, and reusable across all your pages.
The best long-term advice is simple: do not choose the method that is easiest only on day one. Choose the method you can still manage six months from now.
If your site is growing and you want social proof that stays polished without constant page edits, EmbedSocial is the better place to start.
![11 Best Social Media Widgets for Websites [+Top Use Cases]](https://embedsocial.com/wp-content/uploads/2023/11/embedsocial-ugc-software-landing-page-1024x688.jpg)
![How to Embed Video Gallery on Websites [+ 5 Widget Templates]](https://embedsocial.com/wp-content/uploads/2026/02/youtube-channel-section.jpg)